In this article, you'll learn how to create a child page in Q.wiki. Child pages structure your management system and enable a logical hierarchy of content.
Prerequisites
- You have write access to the parent page.
- You know which parent page you want to add the new page under (e.g., "Hiring Employees").
Step-by-Step
Step 1: Open the parent page
Open the page under which you want to create a new page. In this example, we'll use "Hiring Employees" as the parent page.
Step 2: Click "Create Child Page"
Click on Create Child Page. The new page will automatically be placed below the current page in the hierarchy.

Step 3: Choose a page type
A dialog box appears where you can choose between two page types:
- Wiki page: For content you write directly in Q.wiki
- File page: For files you manage in Q.wiki
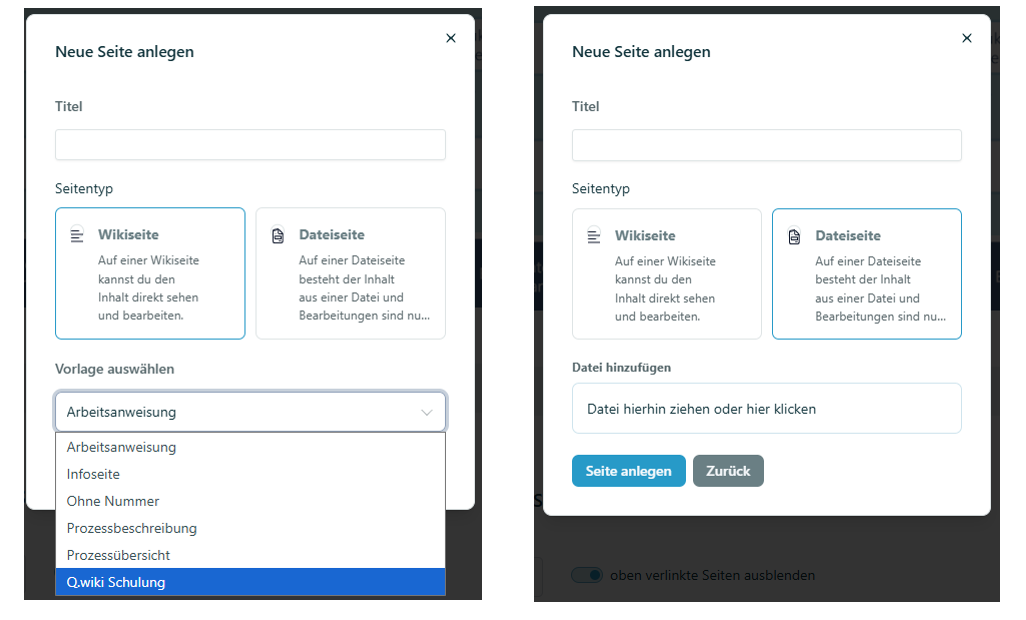
Step 4a: Create a wiki page
If you choose Wiki page, you must select a content template. Then click Create Page. The new page will be created based on the template and assigned to you as the page owner.
Step 4b: Create a file page
If you choose File page, you can add your file in two ways:
- Drag and drop the file directly into the field
- Click on the field and upload the file using the file browser
Then click Create Page.
Step 5: Page is saved
The new child page is automatically saved and appears in the lower section of the parent page. Pages that are already linked on the parent page are marked with a green checkmark.

Alternative: Create a placeholder link while editing
You can also insert a placeholder link while editing a page. Use the link type New Q.wiki Content. You can use this link later to create a new wiki page – the new page will be automatically linked in the correct context.

Next steps
After creation, your page is saved in Draft status. Click Save in the top right to ensure all changes are saved.
Related articles
Was this article helpful?
That’s Great!
Thank you for your feedback
Sorry! We couldn't be helpful
Thank you for your feedback
Feedback sent
We appreciate your effort and will try to fix the article